Playing a vinyl record from the beginning requires a delicate touch and an appreciation for the artistry of analog music.
With the resurgence of vinyl records among audiophiles and music enthusiasts, many are rediscovering the unique listening experience that vinyl offers—an experience that stands in contrast to the convenience of digital music.
Understanding how to handle and play these records properly is essential to ensure both the longevity of the vinyl and the quality of sound it produces.
In Summary
Inspect the Record: Before playing, ensure the vinyl record is clean and free of dust or scratches for optimal sound quality.
Set up your turntable, making sure it’s on a stable surface and the platter is spinning at the correct speed (33 1/3, 45, or 78 RPM, depending on the record).
Cue the Tonearm: Carefully lift the tonearm and position the needle (stylus) at the beginning of the record’s outer edge, where the lead-in groove is located.
Start Playing: Gently lower the tonearm onto the record’s surface to start playing from the beginning, adjusting the volume and settings on your audio system as needed.
To start, ensure that your turntable is properly set up and that the stylus is clean, which is paramount for the best audio output and to avoid damaging your records.
Carefully place your chosen record onto the turntable. Lift the tonearm, position the needle just above the outermost groove of the vinyl record, and gently lower it. This is where the record’s audio begins, and from there, the rich, warm sounds that vinyl is known for fill the room.
The act of playing a vinyl record is more than just a means to hear music—it’s a ritual that honors the full sensory experience of listening.
From handling the jacket and admiring the artwork to the tactile feel of the vinyl and the mechanical movements of the turntable, each step contributes to the overall enjoyment. In this age where digital formats dominate, vinyl records offer a tangible connection to the music and artists of different eras.
Setting Up Your Turntable
Entering the world of vinyl records requires a proper setup of your turntable, which is the foundation of experiencing high-quality audio. You’ll need to understand the components, set up the turntable correctly, and connect your audio equipment to begin your analog listening experience.
Understanding Turntable Components
Your turntable consists of several key components that work together to produce sound. The platter is the spinning surface that holds the record; it’s driven by a motor which can be either a belt drive or a direct drive system.
On top of the record sits the stylus or needle, which is part of the cartridge mounted to the tonearm. An accurate setup of each part is essential for optimal performance.
Turntable Setup Process
When setting up your turntable, whether it’s a manual, automatic, or semi-automatic turntable, the process will involve balancing the tonearm and setting the tracking force to the correct specifications to protect your records and stylus. Additionally, make sure the turntable is placed on a stable, level surface to prevent unwanted vibrations.
- Balance the tonearm: Float the tonearm in a neutral position, then set the dial to zero.
- Set tracking force: Refer to the cartridge manufacturer’s recommended settings and adjust the counterweight accordingly.
- Align the cartridge: Use a protractor tool for correct alignment to avoid distortion and ensure accurate tracking.
Connecting Audio Equipment
To hear your records, you need to connect the turntable to speakers through an amplifier. If your turntable doesn’t include a built-in preamp, you’ll require an external one to convert the phono output to a line-level signal.
- With a built-in preamp: Connect your turntable directly to powered speakers or the aux input on your amplifier.
- Without a built-in preamp: Connect the turntable to an external preamp, then to your amplifier, and finally to your speakers.
By following these detailed steps in setting up your turntable and connecting it to your audio equipment, you’re now ready to experience the full, rich sound of vinyl records.
Handling Vinyl Records
When playing a vinyl record, it’s essential to handle it correctly to maintain its quality and ensure optimal playback. Proper handling and cleaning are fundamental to the longevity of your vinyl.
Proper Record Handling
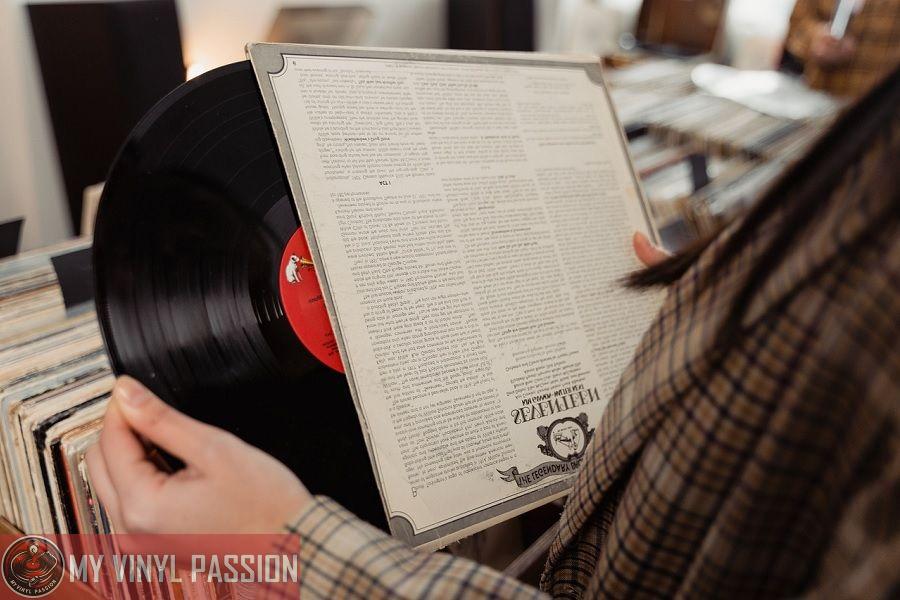
To ensure your vinyl record remains in excellent condition, always hold it by the edges or the label to avoid transferring oils and dirt from your fingers onto the playing surface.
Never touch the grooves with your bare hands as this can introduce dust and oils that detrimentally impact sound quality. When not in use, store your records vertically inside protective inner sleeves to prevent warping and scratching.
Make sure your storage area is free from extreme temperatures and moisture. It’s also beneficial to use a dust cover on your turntable to protect your records while playing them.
Cleaning Your Vinyl
Before and after playing your record, gently clean it with a record brush to remove any surface dust. For deeper cleaning, use a carbon fiber brush or an anti-static brush to eliminate static charges that attract dust.
For thorough cleaning, consider using a record cleaning machine or a solution specifically designed for cleaning records. Always wipe in a circular motion along the grooves and never use harsh chemicals or abrasive materials.
Regular maintenance will preserve your record’s sound clarity and extend its life.
Playing the Record
To play a vinyl record from the beginning with precision, understanding the mechanics of your turntable and handling the vinyl properly are key. Let’s walk through the steps to ensure your listening experience starts smoothly.
Starting Playback
Before initiating playback, ensure that the turntable is connected to a speaker system. Next, select the appropriate speed for your record: typically 33 1/3 RPM for LP albums or 45 RPM for singles.
Adjust the speed selector on your turntable accordingly. Carefully place the record on the platter and verify that it is free from dust and debris.
Using the Cue Lever
Turntables come in manual, semi-automatic, and automatic types, requiring different interactions for playback. For a manual turntable, you’ll need to gently lift the tonearm and position the stylus at the record’s beginning groove.
Use the cue lever to raise and lower the tonearm to prevent damage from unsteady hands. If your model lacks a cue lever, lower the tonearm carefully. Ensure the tracking force is set correctly to prevent damage to both the stylus and record.
Once the stylus is in place, playback will commence. To stop the record, if you’re using a manual or semi-automatic turntable, you will lift the tonearm back to its rest manually. On automatic turntables, the arm returns on its own when the record ends.
Maintaining Your System
Proper maintenance of your turntable and vinyl records is crucial to ensure the best sound quality and prolong their lifespan.
The equipment requires periodic care to minimize wear and tear, and attention to cleaning and setup will keep your system performing optimally.
Turntable Maintenance
Tracking Force and Anti-Skating: Set the tracking force of your needle according to the cartridge’s specifications.
Incorrect tracking force can cause excessive wear to both the stylus and your records. Regularly check the anti-skating setting to prevent the stylus from being pulled towards the center of the record, which can distort sound and damage the groove.
- Always refer to the manufacturer’s instructions for the precise tracking force.
- Anti-skating should be adjusted in tandem with the tracking force.
Stylus Care: Inspect your stylus frequently for dust and debris; a dirty needle can impair audio quality and harm vinyl grooves. Clean gently with a soft brush or a stylus-cleaning product.
- Never touch the needle with your fingers, as oils can contaminate the stylus.
- Replace the stylus after every 1,000 hours of play to prevent degradation of sound.
Vinyl Care and Longevity
Handling and Cleaning Records: Handle your vinyl by the edges or label to avoid transferring oils and dirt. Use a record cleaning solution and a soft, anti-static cloth or brush to clean your records before and after each use.
- For a thorough clean, consider a record cleaning machine.
- Always store your records vertically in a cool, dry place to prevent warping.
Table: Basic Vinyl Maintenance Checklist
| Action | Frequency |
|---|---|
| Stylus Cleaning | Every play |
| Record Cleaning | Before/After play |
| Tracking Force | Check monthly |
| Stylus Replacement | Every 1,000 hours |
Remember, regular maintenance not only preserves your records but also enhances your listening experience.
Understanding Record Culture
When you engage with vinyl, you’re not just playing music; you’re participating in a culture that values the tactile experience and the ritual involved in listening to LPs.
The Vinyl Experience
The resurgence of vinyl as a medium, often called the vinyl renaissance, is about more than just music—it’s about an engaging, multi-sensory experience.
When you handle a vinyl record, the tactile connection is palpable. From unboxing the album to admiring the artwork and feeling the texture of the pressing, every step is part of the process.
Placing the needle on an LP like the Audio-Technica AT-LP120 or the beginner-friendly AT-LP60 offers a certain satisfaction that streaming services like Spotify simply can’t match.
Operating a vinyl player, such as the U-Turn or classic gramophone, incorporates a form of ritual into your listening routine. This ritual enhances the overall experience, allowing you to connect with the music on a more intimate level.
The physicality of the medium—the grooves, the weight of the vinyl, even the occasional pop and crackle—adds an aesthetic dimension to the act of listening that digital formats lack.
Collecting and Exploring Music
Collecting vinyl records goes beyond just accumulating music; it’s a hobby that involves exploring various pressings and editions. Each record holds a story, from the music it contains to its production and design.
The cover art and liner notes of LPs provide a deeper insight into the cultural context of the music era they represent.
Your journey as a collector might lead you to all-in-one options, which are convenient, but exploring dedicated audio components can significantly enhance your audio experience.
The Audio-Technica AT-LP120 is a popular choice for its high-quality sound reproduction and durable build. As you delve into the world of vinyl, you’ll learn to recognize the signatures of different pressings and what makes each unique—be it limited editions, colored vinyl, or special audio quality.
By immersing yourself in record culture, you’re not just listening to music—you’re becoming part of a timeless tradition that celebrates the fullness of music through a physical and aesthetic form.
In Conclusion
To maximize your listening experience, it’s essential to ensure your audio setup is optimal. Start by positioning your furniture to create a favorable acoustic environment. The placement of speakers and record players should aim for a balanced sound that complements the room.
When it comes to sound quality, vinyl records have the potential to deliver superior audio fidelity. Remember, precision in handling your records and operating the turntable is key. Gently place the needle at the beginning of the record to avoid scratches and ensure clean playback.
While digital audio offers convenience, vinyl brings a unique warmth and richness to music. Invest in a quality record player that suits your needs and preferences, whether you’re a casual listener or an avid collector.
Regular maintenance of your equipment will preserve the quality of sound and prolong the life of your records. Clean your vinyl regularly and store it properly to avoid damage.
By following these simple yet effective practices, you’ll ensure that each time you play a record, the experience is as the artist intended—immersive and authentic.
FAQs
What equipment do I need to play a vinyl record?
To play a vinyl record, you need a turntable with a stylus (needle), a preamplifier or a receiver with a phono input, and speakers. Ensure your turntable is compatible with the record’s speed (33 1/3, 45, or 78 RPM).
How do I properly place the needle at the beginning of a vinyl record?
Gently lift the tonearm and carefully position the needle at the outer edge of the record, where the lead-in groove is. Lower the tonearm slowly to avoid damaging the record or stylus.
Can I touch the surface of the vinyl record?
Avoid touching the grooved surface of the record with your fingers. Oils and dirt from your skin can damage the grooves. Handle the record by its edges and label only.
How do I know if my turntable is set to the correct speed?
Check the label of your vinyl record for its playing speed (most commonly 33 1/3 or 45 RPM) and adjust your turntable’s speed setting accordingly. Some records, particularly older ones, may play at 78 RPM.
What should I do if the sound quality is poor when playing a record?
Poor sound quality can be due to a dirty record, a worn-out stylus, or incorrect setup. Clean the record with a soft, anti-static brush or cloth, check the stylus for wear, and ensure your turntable is properly calibrated, including the tracking force and anti-skating settings.
